Continuous Integration and Automated Testing
Continuous Integration (CI) consists of automated tests in a development setup. Generally speaking, it means that whenever a developer makes a commit, automated tests or even deployments are executed. For PySoaSE, it means that a full mod check is run.
Relevant scripts and configuration files can be found in the automation/
directory of the Gitlab repository.
GitLab CI
GitLab is a feature rich Git hosting suite, which can be used as a service for free or as a locally running instance on any Linux server. It’s CI feature supports the execution of arbitrary scripts and is configured via a YAML configuration file in the project repository’s root directory.
PySoaSE provides a configuration file under automation/gitlab.yml in the
project repository.
Once the configuration is complete, every push to the repository on GitLab
will result in a test run. This run consists of two phases. In the first phase,
called pysoase_run, the actual test is conducted. All files currently used
by the mod, e.g. those listed in their types respective *.manifest files
will be checked for problems. Only the most recent commit of the push is
tested. The results of those tests are then stored as artifact files in the
form of lists of problems. After the tests are completed, the second phase,
dubbed analyse_problems, is kicked off. In this phase, the list of problems
generated in the previous pysoase_run phase is compared to the list of
problems from the most recent previous push. The comparison will then first
output the most current list of problems and then all those problems which were
newly introduced by the most recent push. If there are no new problems, the test
will pass, otherwise it will fail.
The results of a test run can be viewed in a variety of places.

Result of the most recent test run for the master branch displayed on the project main page
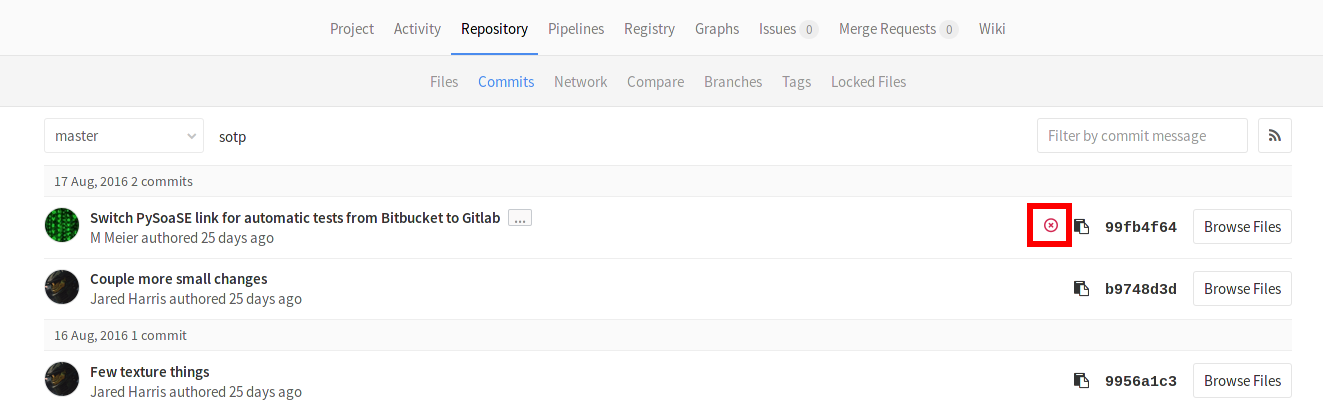
Results per commit in the project’s commit overview
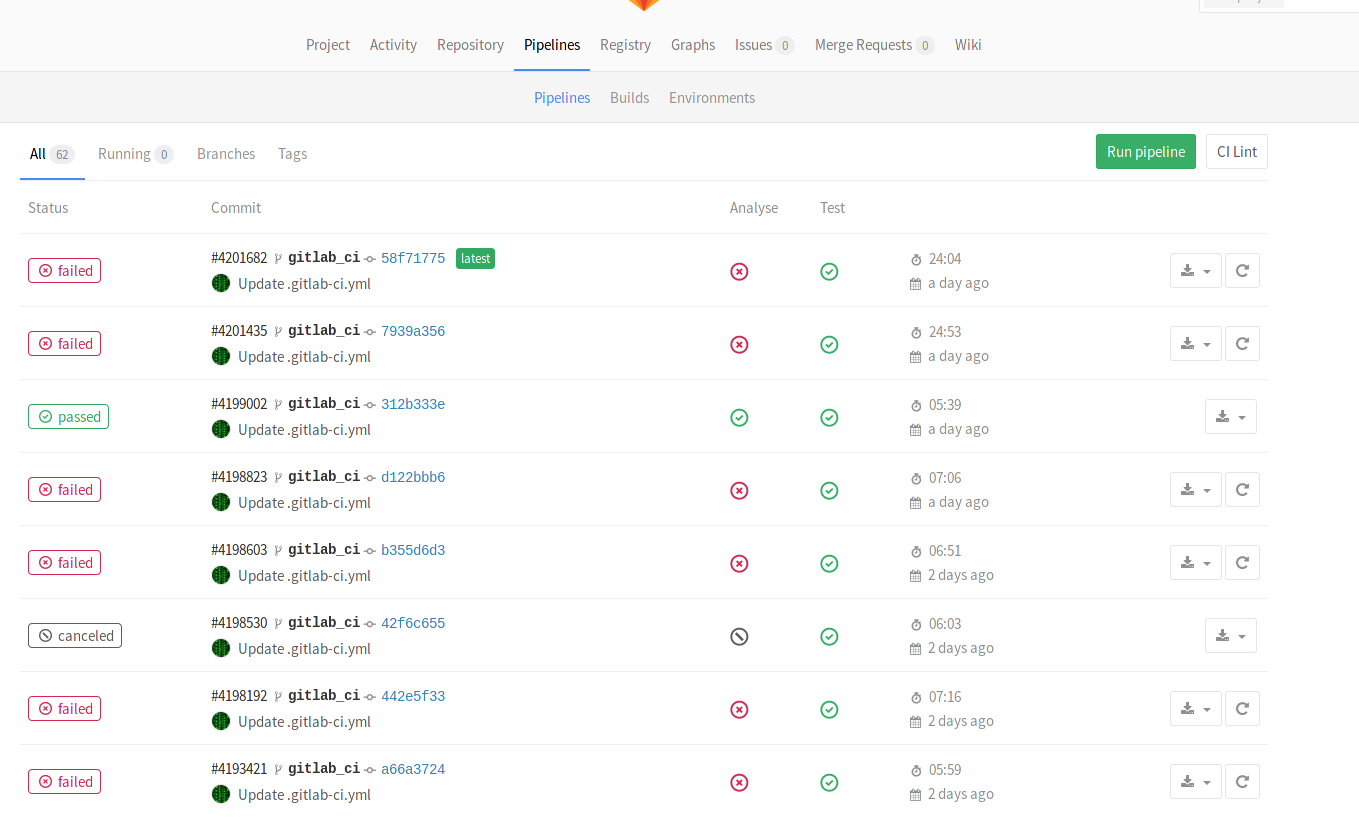
Overview of all tests for the project
To see the lists of old and new problems, click on any of the previous pass/fail markers. This will take you to that specific test run’s overview page, shown in the following figure:
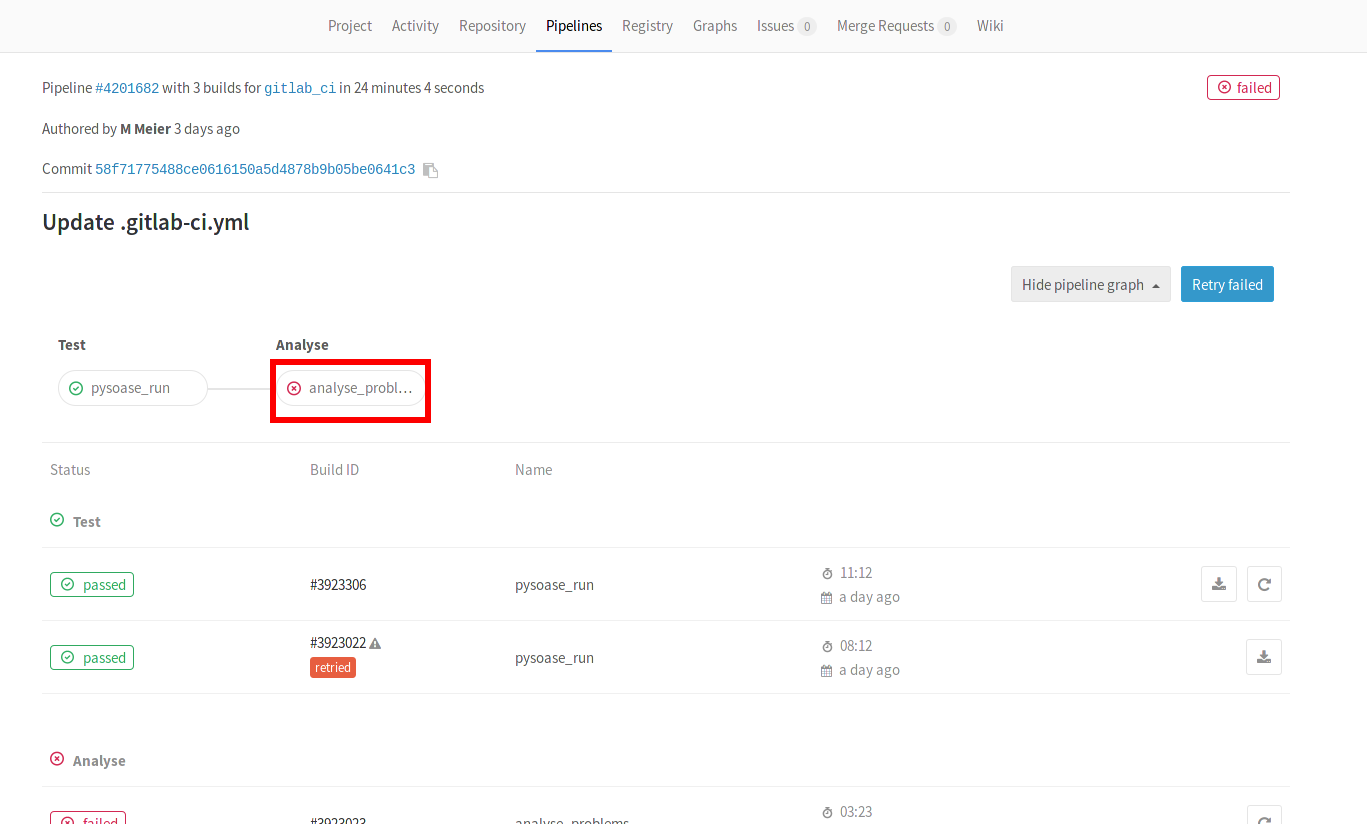
Overview of a single test run
Click on the marked analyse_problems button, which will lead you to the output of the test script.
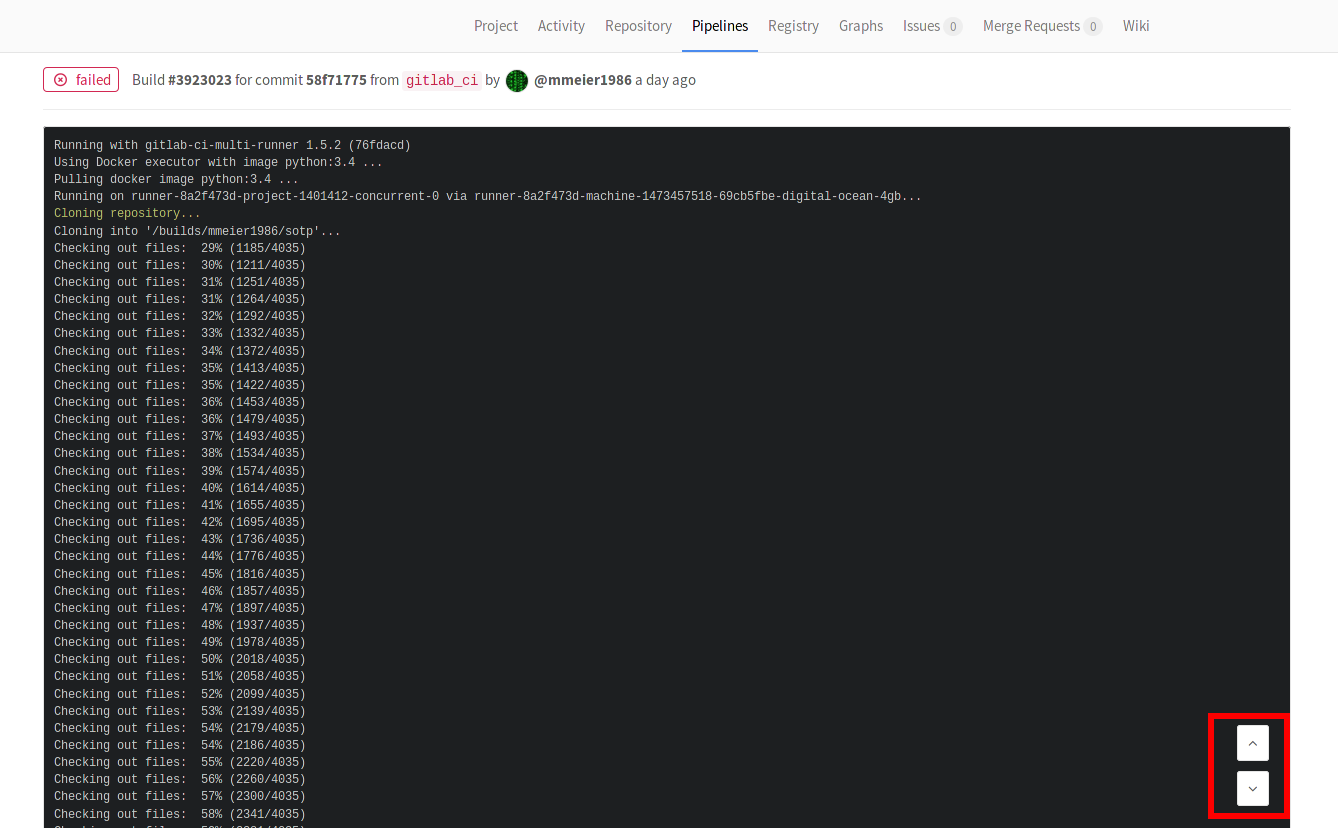
Output of the analyse_problems stage
A lot of the output is purely for logging purposes and not that interesting to modders. The important part is at the very end, with the output of the problem list comparisons. To get there, click the down button marked in the screenshot. It will take you to the end of the output.
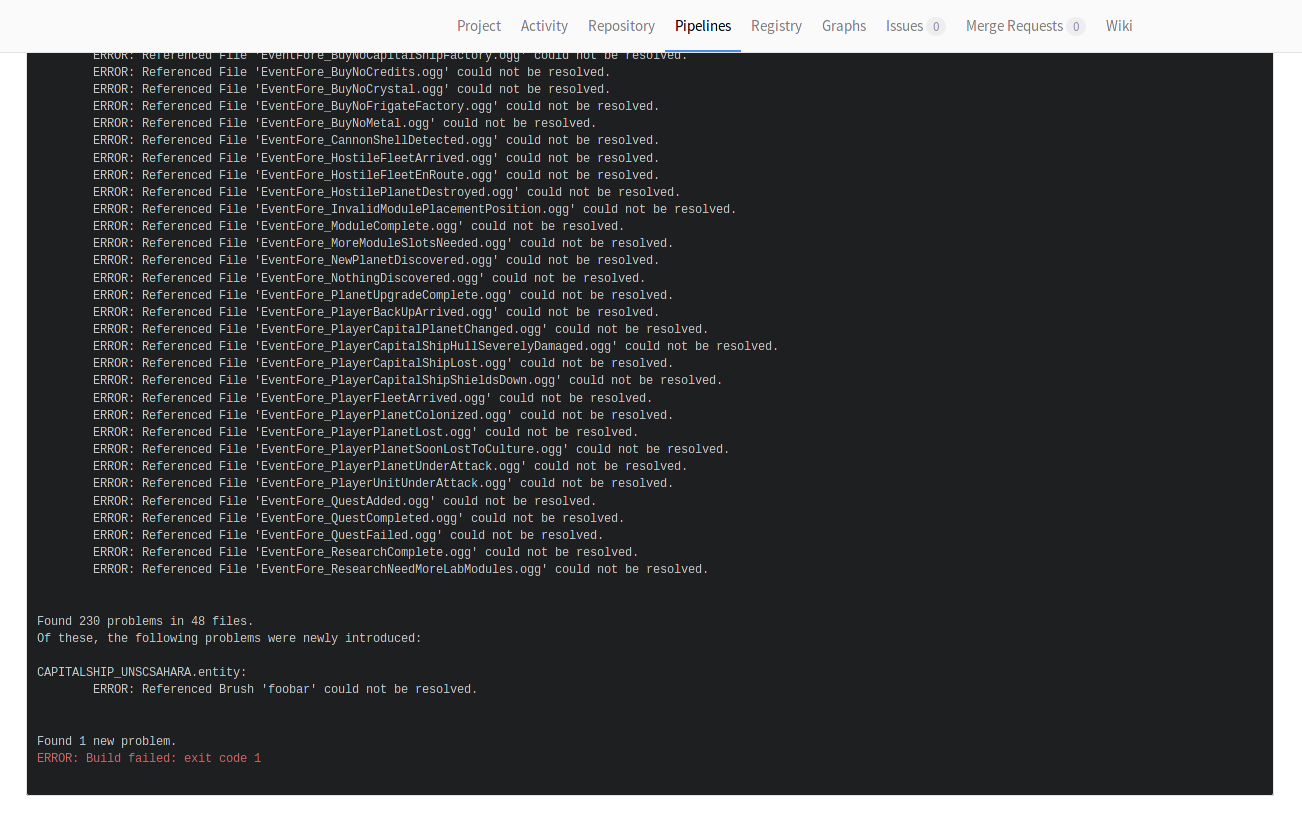
Finally, the newly discovered problems
Configuration
To configure your project to use GitLab CI, the following steps need to be followed:
- Copy the current
automation/gitlab.ymlfile to your repository’s root directory as.gitlab-ci.yml. Note the leading ‘.’! - Configure Access Token
- Push your commit with the addition of the
.gitlab-ci.ymlfile to GitLab
Configure Access Token
For the GitLab CI script to work correctly, it needs access to the GitLab REST API. For that API access, a special access token is needed, as the API does not accept normal username/password combinations.
The first step is to obtain such a token. It needs to be obtained by a
team member who has at least Developer access level for the project. To
obtain the token, the user needs to enter his GitLab profile settings via the
avatar in the top right corner of the GitLab GUI. Then, enter the Acess Tokens
page.

Figure 1 Access token generation screen for GitLab users
On the access token screen, depicted in figure 1,
enter any name in the Name field. You may consider calling it something
like PySoaSE, so you know what it is used for later on.
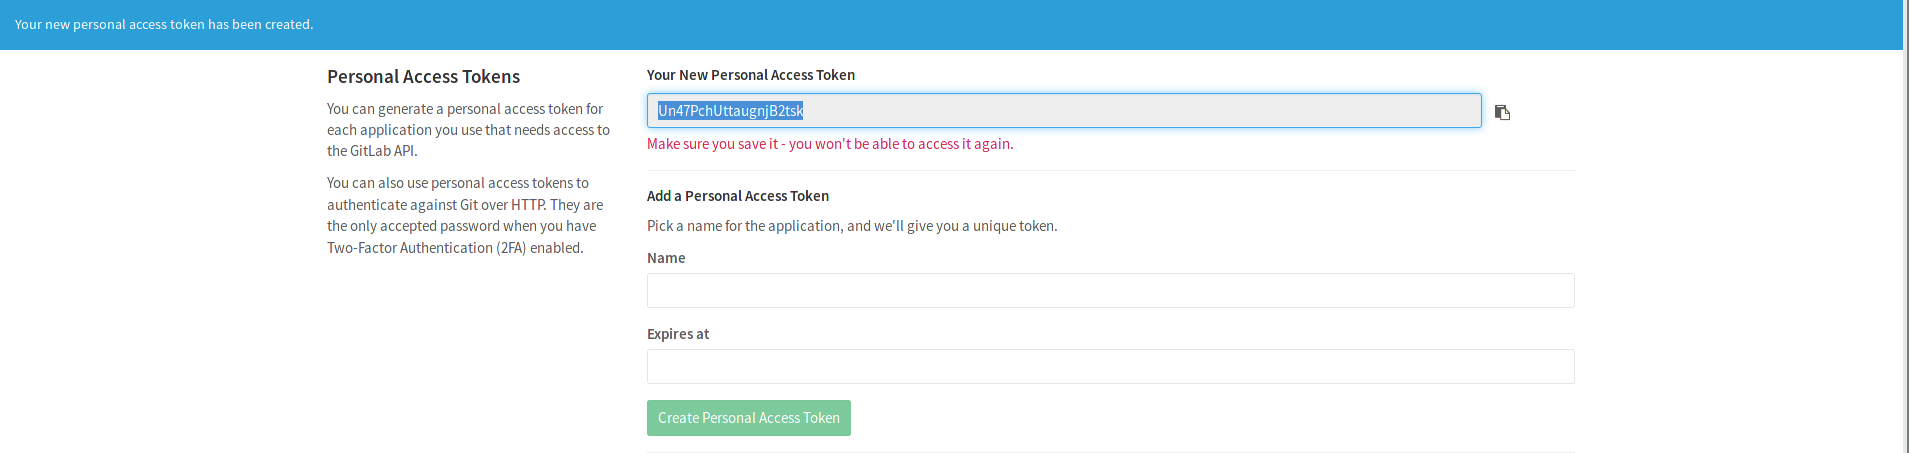
Figure 2 Newly generated access token
After clicking Create Personal Access Token, a new screen comes up, partially
depicted in figure 2. On this screen, the field
Your New Personal Access Token contains the token. Immidiately copy
and save that token! After you close the page, the token can not be retrieved
any longer.
Now, armed with the access token, go to your project’s main page, and enter
the Variables configuration screen, as shown in figure 3.
Enter ACCESS_TOKEN into the Key field and copy your newly generated
access token into the Value field and hit Add new variable.
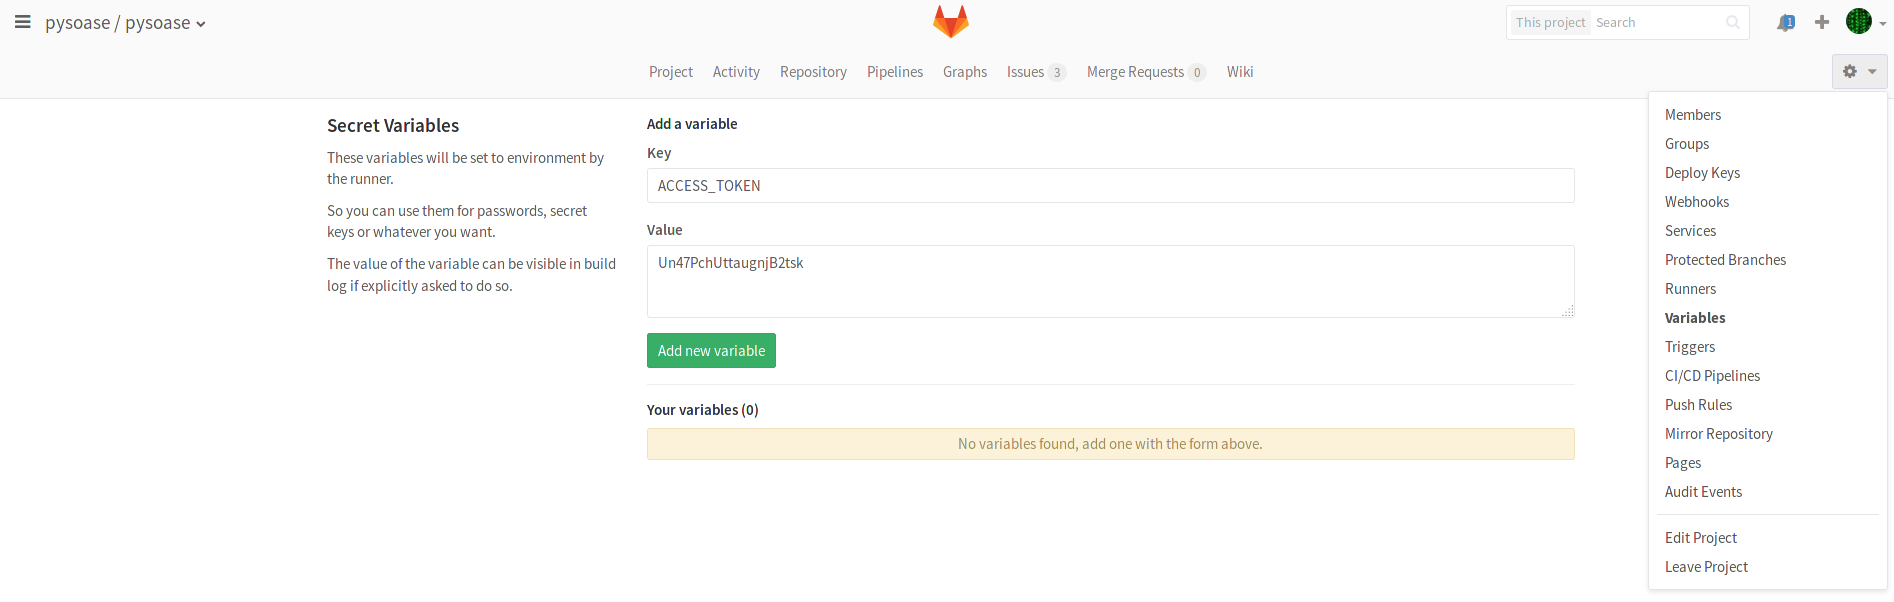
Figure 3 Enter environment variables for test runners